Tuesday, June 6, 2017

Egg Muffins

I often have bouts of high energy when I accomplish a lot of things during the day. On the other hand, there are days when I feel like doing nothing except reading and watching TV. On weekends my dream is to wake up to a cup of coffee with breakfast in bed. For some reason my husband did that for a year in our more-than-a-decade-long-relationship, not a day more, not a day less. In fact, in those days, I was stricter about our dietary choices because of his blood cholesterol level. I remember how he would reminisce about adding bacon in his omelette without giving it any thought in his pre-wife days. Strange thing is despite having bacon in the refrigerator these days, he seemed to have lost any interest in making a weekend breakfast. Guess I pushed him too hard 😄

However, I refuse to eat the same breakfast on weekends. So I want my weekends to feel different from weekdays. The only problem being the fact that I lose all energy by Friday night and wake up with no plans on Saturday. I then end up just rummaging through the pantry/refrigerator and make something with whatever I can find. One of these ad-hoc ideas were these egg muffins. They are quick, tasty and hassle-free.

egg-muffin-breakfast-recipe


egg-muffin-breakfast-recipeIngredients:
Eggs
Chopped onions
Chopped veggies of your choice, I used spring onions, bell pepper, green chillies, cilantro
Shredded Mozzarella
Salt, pepper

Recipe:
Lightly fry chopped onions, spring onions, bell peppers, green chilli, cilantro, shredded mozzarella with a pinch of salt or per taste
Bake for 20-25 mins, at 350. I used a 12 cup muffin pan. Fill 2/3rd of the cups leaving the muffins some room to rise

Perfect with Coffee!

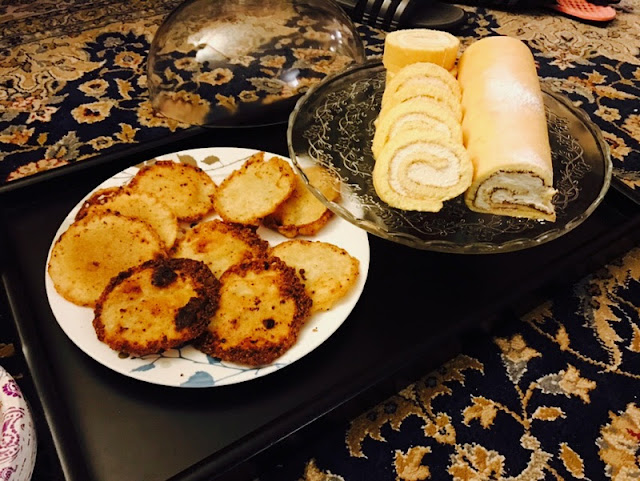
Swiss Roll

I grew up in a large extended family in Kolkata. Despite being the only child I had the chance to experience growing up with siblings, so to speak. Because of that I was always taught to share my toys or candies with them. There were a few things that I hated sharing but being the eldest one I was left with no choice. One of these was the swiss roll. I remember the days my Aunt would drop me and my brother (her son) off at the school bus. There was a bakery on the way to the bus stop from where she used to buy swiss rolls for our lunch. My brother would immediately start eating and then ask for half of mine. I wasn't thrilled by his lack of self control but shared regardless. 

Ever since those childhood days the Swiss roll has been one of my favorites. Although, it is called the Swiss roll it is believed to be originated in Central Europe, not exactly in Switzerland. There was something similar in Britain called the Jelly Roll. 

swiss-roll-recipe


Ingredients:
1/3 cup cake flour
3 tbsp cornstarch
1/2 cup and 1 tbsp granulated white sugar, keep the sugar divided
4 large eggs
1 egg yolk
1 tsp vanilla extract
1/4 tsp cream of tartar

Ingredients for filling:
1 cup heavy whipping cream (40% butterfat)
1/2 tsp vanilla extract
1-2 tbsp granulated sugar
2 tbsp apricot jelly

swiss-roll

Method:
I used a baking pan about 11"/15". It's a good idea to use a greased parchment paper for these types of soft cakes
Keep the eggs cold as well as the whisk and the bowls
separate 2 egg whites from the yolks (make sure you don't have any yolk in the whites)
With the 2 yolks add the remaining 2 eggs and the additional yolk
Start whisking while the eggs and the attachment are still cold 
After the eggs turn pale yellow start adding in the sugar bit by bit, whisk until fluffy
Then mix the vanilla extract
Mix flour mixture in and fold gently so the eggs don't get deflated
Gradually mix the entire flour mixture until mixed well
In a separate bowl add the egg whites and beat well until foamy and soft peaks form, add the cream of tartar as you start beating and add the sugar slowly as you beat
Now add this foamy white to the egg-flour mix
Fold gently until incorporated well
Pour the batter into the prepared pan and bake for 6-10 minutes or until a skewer inserted comes out clean
Cool it down a little bit, and put another parchment paper on top and start rolling the cake while still warm, that way it will prevent the cake from breaking when rolling it later when cold
Now keep it on a cooling rack until it comes back to room temperature

Filling:
In the meantime you can make the filling
Beat the whipping cream until medium peaks form
Gradually add the sugar in, while beating
Add the vanilla extract
Don't make the filling sit for too long

Making the Roll:
Now make the cake flat and pour the filling. Flatten with a spatula
Lightly spread the apricot jelly on over the vanilla filling
Then roll back
Refrigerate the roll before serving

swiss-roll-recipe


Sunday, January 8, 2017

Potoler Dolma (stuffed parwal)

I am remembering a lot of fun memories while writing this recipe. When I first came to the US we didn't find pointed gourd or parwal in the west coast. I was literally so sad to have missed my most favorite vegetable, I even considered moving to the East Coast or to India for that matter. After that when we started getting parwal in the west coast I remember it was very expensive. I would still buy as much as I could and then we had all sorts of potol recipes for the rest of the week. Unfortunately, my husband wasn't that fond of potol as much as I was. Strangely for potol I have seen either people love them or hate them, usually no middle ground. One very popular potol recipe in Bengal is "potoler dolma" or stuffed potol. It is made with much bigger gourds. However, it is quite difficult to make dolma with the small gourds we get here, I still manage to make them once in a while. The stuffing can be either vegetarian or non-vegetarian. Usually, non-vegetarian dolma is served during wedding/reception lunches, made with fish or minced meat or prawn. While the vegetarian stuffing is made with the pulp (inside of a potol) mixed with coconut or some kind of nuts. This particular recipe is vegetarian. This is one of those recipes that require longer prep-time that cooking time. 

potoler dolma

Ingredient:
Pointed gourd or parwal, about 6-7, inside pulp including seeds scooped out
Chopped onion 1/4th cup
Ginger 1/2 tsp for stuffing and 1/2 teaspoon for cooking
Green chilli- 2 or 3
1/2 tomato chopped
1/2 tsp cumin powder
Pinch of whole cumin for tempering
Salt and sugar for taste
1 tsp turmeric
Oil

Recipe:
With the help of a knife lightly scrape the body of the gourds
then cut one tip so we can fit the back of a spoon and scoop out the meat inside (like photos)
Grate the pulp with the coconut and and ginger
Smear the gourds with salt and turmeric and fry lightly until they are cooked and fried
To prepare the stuffing add some oil to the pan, add onion and fry well
Add ginger (1/2 tsp), and saute well
Add the grated coconut and fry well
Add salt and sugar per taste
Now fill the gourds with this filling once ready to handle
In a separate pan add some more oil
Temper some whole cumin
Add ginger and rest of the tomato
Add the whole chillies
After sauteing well add some cumin powder
Add a little water depending on how much gravy you want (I made this one very dry)
Add salt and sugar
Spread the gravy over the gourds


potol-dolma-recipe


Yogurt in Electric Pressure Cooker

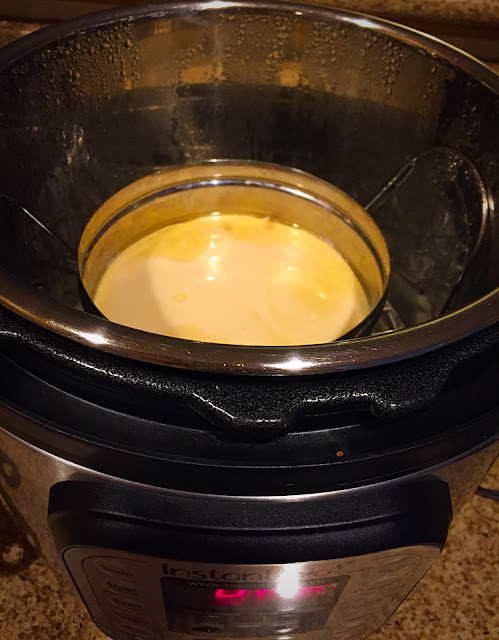
I had been planning on buying an electric pressure cooker for a long time. The sole reason I resisted buying a rice cooker or a slow cooker is because the electric one does it all. I have been using my electric cooker that I bought from Amazon for a little over two years now. After trying different cooking options, I have to say this is one of my prized kitchen gadgets. I am glad to have made the yogurt using the pressure cooker finally. It turned out to be perfect. We ate it for dessert the following day and kept some in the refrigerator. I didn't make it too sweet but I guess you can make it sweeter if you like. 

homemade yogurt

I just followed the direction from the cooker recipe booklet. I added about 1 tablespoon yoghurt for 1 cup of milk. And about half a tablespoon sugar to that. First thing I had to do is steam the milk using the water and steam function as directed by the manual. Then cool it down to a temperature okay to handle. Mix the yoghurt stirring gently. Next put the bowl (steel or baking bowl will do) on the steaming rack. Use the yoghurt function and follow the instruction. I set it overnight as it took 8 hours.  
   

Cilantro and Bell Pepper Chicken

Hope you all had a wonderful Christmas. We spent our christmas hopping around theme parks this year. My son was super excited to meet his hero Optimus Prime from the Transformers movie at Universal studios. We had our share of fun with the rides at Disneyland, Universal Studios and Legoland and the amazing LA food, of course. I am planning to do another post with all the restaurants we visited during our Los Angeles visit. California never fails to please our appetite in its literal sense.

After coming back from a week long vacation, we were longing for some home-cooked food. My son was craving for some home-made chicken curry but I didn't feel like making the same old curry. Therefore, I decided to make something different. Here goes the recipe and the outcome. 


cilantro-chicken-indian-recipe


Ingredients:
1 whole chicken
1 onion thinly sliced
2 tbsp garlic paste
1 tbsp ginger paste
4-5 green chilies
1/2 tsp garam masala
1/2 a bunch of cilantro
1/2 tomato
1/2 red bell pepper
1 tbsp vinegar
Salt, sugar, turmeric and black pepper per taste
Mustard oil and vegetable oil

cilantro-chicken-indian-recipeRecipe:
Blend the cilantro, bell-pepper, green chillies and tomato together with a little water
Marinate the chicken with salt, vinegar, ginger and garlic paste for at least about 2 hours 
Heat some oil in a pan. I used both mustard and vegetable oil together
Add the sugar and black pepper to the hot oil
Fry the onion very well until brown
Add garam masala
Then add the marinated chicken
Cook the chicken until half done and all the water is dried
Then add the cilantro-pepper blend
Cook it at medium-low heat for 20-25 minutes until oil separates, sprinkle water as needed to make sure the spices don't stick to the bottom


indian-chicken-recipe


Shabu Makha (tapioca mix)

I was feeling extremely lethargic the whole day yesterday and didn't feel like cooking or eating. As I was thinking of making some sort of salad or one-dish meal that would be fast and easy, my mom reminded me of 'shabu-makha'. People that have grown up in Bengali households are most likely to be familiar with this dish, especially, those with grandparents. I remember this to be the staple food for my grandmothers on auspicious days or to break a fast. I used to look forward to those days for these special meals. Guests used to bring fruits as presents and my grandmothers would mix the tapioca with the fruits. Now if you think of it, tapioca is actually a very good source of carbohydrate which is rich in iron, and low in sodium. Therefore, it soothes a fasting stomach while at the same time providing a good source of energy. Anyway, it requires absolutely zero preparation time, so good for a lazy cook as well. That said it does require to be soaked in water overnight. So needs some planning time definitely.


Method:
Wash the tapioca in clear water and soak overnight
Run through cold water one more time before preparing
Add 2 tbsp of milk for a cup of soaked tapioca
Add half of a large banana or a small banana
Add some fruits, raisins and nut chopped per preference
Add grated coconut (I used the frozen one)
Sugar per taste
Mix everything together and let it sit for 10/15 minutes
Ready to serve